Showing posts with label Little Compton. Show all posts

Saturday, July 16, 2016

A Fool for Sour Cherries


“Tragic,” my fellow-cook Anne said.

Tragic to us is what I did the other day.  I drove to Little Compton for a visit, going from one friend to another. On the way, I stopped at the Fruit Lady’s, and to my surprise, she still had sour cherries: living nearly an hour away on the other side of the bay, and being very busy in June and early July, I have missed them this year. So I was thrilled to see them.

There was only one pint, though, which I bought along with three colors of currants, and asked if there would be more later in the day: they put the fruit out twice a day.  The Fruit Lady makes no promises, but after stopping at Walkers on the way out for corn (gone—went to Karla for that and some fresh garlic) and lettuce and real cream (success), I stopped at the Fruit Lady’s on the way out and there, on the stand, were two pints!  Waiting for ME! I snatched them up, together with a cup of raspberries (I’d bought the currants and raspberries in the morning), and went to pay. Fruit Lady husband/farmer, Dick, was there, and though we’d spoken at length in the morning, we struck up a conversation again. I talked while rummaging around for more cash and bagging up my purchases, eager to get on the road back through Newport before the traffic got really bad. I hit the road, happy.

At home, I unloaded my treasures of lettuce, cream, milk, corn, garlic, some discounted perennials, currants, raspberries, and….cherries? Where are the rest of my cherries??

Left. Lost. A fool. Ergo: Tragic.

But I did have my one pint. Not enough for a pie, but still. What to make? A batch of cocktail cherries? Some little turnovers? Some of my favorite jam? I decided—it seemed fitting—on a fool. I had that wonderful cream, after all, and I could do a semblance of a cherry pie filling for the fruit.

It was trash day, and while the filling was doing its quick cooking on the stove, I did my usual survey of the refrigerator and freezer to see what, if anything, needed to go.  And there, lying right at the top of the freezer drawer, tightly wrapped, was something I’d forgotten about: a single layer of Mrs. Lincoln’s sponge cake . So maybe I’m just a trifle of a fool, after all.


Sour Cherry Fool or Trifle


You can make a close facsimile of a fool with just the cherries and cream, or turn it into a close relative of a trifle with the added cake.  A fool is usually made with fresh fruit, and a trifle with custard, but these are close enough. The trifle is surprisingly light and refreshing—a nice summer dessert.  This would be good with blueberries treated similarly.

2 c sour cherries, pitted
½ cup sugar
juice of ¼ lemon
1/8 tea cardamom
dash cinnamon
dash salt
1 ½ T corn starch
 
1 cup fresh, high-fat heavy cream
2 T + 2 tea sugar
½ tea vanilla

1 thin layer homemade sponge cake, or 1 pkg lady fingers
¼-1/3 cup white wine
2 T rhubarb or other fresh red-fruit syrup (optional)


For the cherries:

Place the cherries, sugar, lemon juice, spices, salt, and cornstarch into a heavy aluminum 2-qt saucepan.  Turn the heat on low, and after the sugar has begun to melt and the cherries to throw off liquid, turn the heat to medium-high and cook, stirring occasionally, until thickened. This will take no more than 5 minutes; do not overcook. Cool to room temperature.

For the whipped cream:

Beat the cream with the sugar and vanilla until it forms soft (not stiff) peaks.

To assemble:
 
In a pretty bowl, preferably glass, make layers, beginning and ending with the cherries, as follows:

1. Tear about a third of the sponge into pieces and fit them around the dish fairly snugly. Sprinkle with a little of the syrup and the wine.

2. Spread a layer of whipped cream to cover (a little less than 1/3).

3. Spread about 1/3 of the cherry mixture over the cream, not quite to the edges. 

4. Repeat. You should have a little whipped cream left over for garnish if desired.  Layers will not be as visible as in a trifle made with firm custard, but will be nice when scooped out. Cover and chill for  3-6 hrs.   

Remove from the refrigerator about 10-15 minutes before serving (you do know how I object to anything too cold to taste). Serve in glass or white bowls if you have them, with a little extra whipped cream. Garnish with a little grated lemon zest, or with a little mint, if desired.


Sunday, December 6, 2015

Leaf Lard + Stayman Winesaps = Iconic Apple Pie

-->


Trendsetter that I have always been, my beloved fat of choice for fruit pies is, at long last, making a comeback. It had gotten to the point where it was near-impossible to find even the commercial (hydrogenated) lard, and recipes that once called for lard—Mexican dishes and many old-fashioned baked goods—had been rewritten to call for Crisco or oil: for shame! But now, lard, like butter, is enjoying a resurgence as a natural food. People are actually making lard again! I have not yet found a local source—I am confident, or at least hopeful, that there is one—but carefully rendered pure leaf lard is increasingly available by mail order.   Thank you, sane and dedicated pig farmers.

Leaf lard is the exceptionally white and pure visceral fat from around the kidneys of the pig. A few words about lard, and leaf lard in particular, will, I hope, do its bit to help restore lard to its rightful place in cooking and baking. Lard was, of course, the most common fat in America before the development of stable oils, widely available commercial butter, and (don’t get me started) margarine. It was used just as one would use butter, not merely for baking or cooking but also to spread on bread (think lardo as served now as a special item in some Italian restaurants).  But lard’s decline in demand was not simply a matter of new, improved products replacing the old; its disappearance had as much to do with smear (no pun intended) campaigns as anything else.

This was ironic, given lard’s properties and characteristics versus many oils, butter, and margarine. For example, pure rendered lard has zero (that’s 0) transfats; it has a much higher percentage of “good” fat (monounsatured), and lower percent of saturated fat (the “bad”) than butter and the trendy coconut oil. It yields a flaky, rich pastry that has particular affinity, in my opinion, for pome and most drupe fruits, poultry and meats (as in empanadas or meat pies), and most berries. It is excellent for frying chicken and potatoes, and as a fat in old-fashioned cakes, cookies and breads, from biscuits and rolls to those containing fruits and nuts.  It adds depth without flavor; no, it doesn't taste like pig. And last but not least, lard, as an agricultural by-product of pigs that can be raised and produced locally, is sustainable and reflects a minimal-waste philosophy.

In time for the holiday baking, I had recently ordered my leaf lard (and some interesting smoked lard that makes very nice roasted potatoes) from FannieandFlo, when I spotted some Stayman Winessaps among the many apple varieties at the store. They were a local offering, unadorned by stickers or shine, priced 20 cents below any other variety. While everyone else grabbed their new-fangled Galas, I grabbed those. Along with Gravensteins and a few other old varieties, the Stayman Winesap is a fine baking apple.  With lard and good local apples in hand, there was only one thing to do: make a pie.


Classic Apple Pie with Lard Crust

You can make a butter and lard crust like this one, or, as I did for this pie, an all-lard crust.  Don’t put a lot of spices in your pie (especially clove or allspice); cinnamon, perhaps a touch of nutmeg if you  must, is all an apple pie needs.


Pastry for a double-crust 9” pie

2 ¼ c a-p flour
2/3 cup cold leaf lard
1 tea salt
6 T ice water


Filling
8 large apples (Cortlands, Macouns, or other crisp and tart-sweet baking apple can be used)
scant cup of sugar
cinnamon to taste
3 T a-p flour
pinch salt
1 T lemon juice
2 T unsalted butter

Make your crust in the usual way, by cutting the fat lightly into the flour and salt, then bringing it together with the cold water. Divide and chill, wrapped in plastic or wax paper. I prefer to make my pastry a day or more ahead (freeze it if you don’t plan to use it for a few days, then thaw in the refrigerator.

While the pastry is chilling, put the sugar, flour, cinnamon, and a pinch of salt into a a large bowl. Peel, core, and slice your apples about 1/4” thick, tossing them into the sugar mixture as you go. Add the lemon juice and toss. Always taste the juices before you fill your pie, adding additional cinnamon or a speck of salt if needed; you don’t want your pie to be over-spiced, but you don’t want it bland either.

Preheat the oven to 375F.

Roll out and fit the bottom crust into the pie plate; fill with the apples and pour in the juices. Dot the apples with the butter. Roll out the top crust and fit it over the apples. Trim the pastry as needed; turn it under to sit on the rim, and crimp. With a fork or small skewer, poke some holes into the crust to vent steam. If you have time, refrigerate the filled pie for 10 or 15 minutes.

Bake the pie in the middle of the oven for 45-60 minutes, or until it is golden, fragrant, and the juices begin to bubble through the vent holes. You can use a tiny bamboo skewer inserted into one of the vent holes to check that apples are cooked if you are not sure. Remove the pie and let cool completely before serving.

Sunday, June 28, 2015

Back in LC: Buttermilk III


Actually, I’ve been back in Rhode Island for just over a month now, but just got down to LC, where thoughts turn to baking and guilt about my on-life-support blog.  A few friends from here have mentioned it, subtly (as in, “I haven’t seen the blog in a while”) or not so subtly (“Are you going to do the blog now that you’re here?”). So here I am, sending this out to my few but fierce believers, after a month lolling about like a slug.

Which I totally needed after a horrific academic year, and six-months-and-counting of recovering from the dreaded (as in, do not get this injury) trimalleolar fracture.  Bones healed perfectly (“like a 20-year-old!!” surgeon crowed). Yeah, but all that other stuff—you know, the stuff that actually lets you walk—ligaments, tendons, muscles, nerves—a massive contractured, painful, scar-tissued mess. A metal plate with nine screws and a 4” bolt are the least of it.


But I can now stand and limp around crutch-free for short distances well enough to bake. And I must say that I do have some personal pent-up demand to break out the rolling pins and pie plates, after more than five months of being pretty much incapacitated.


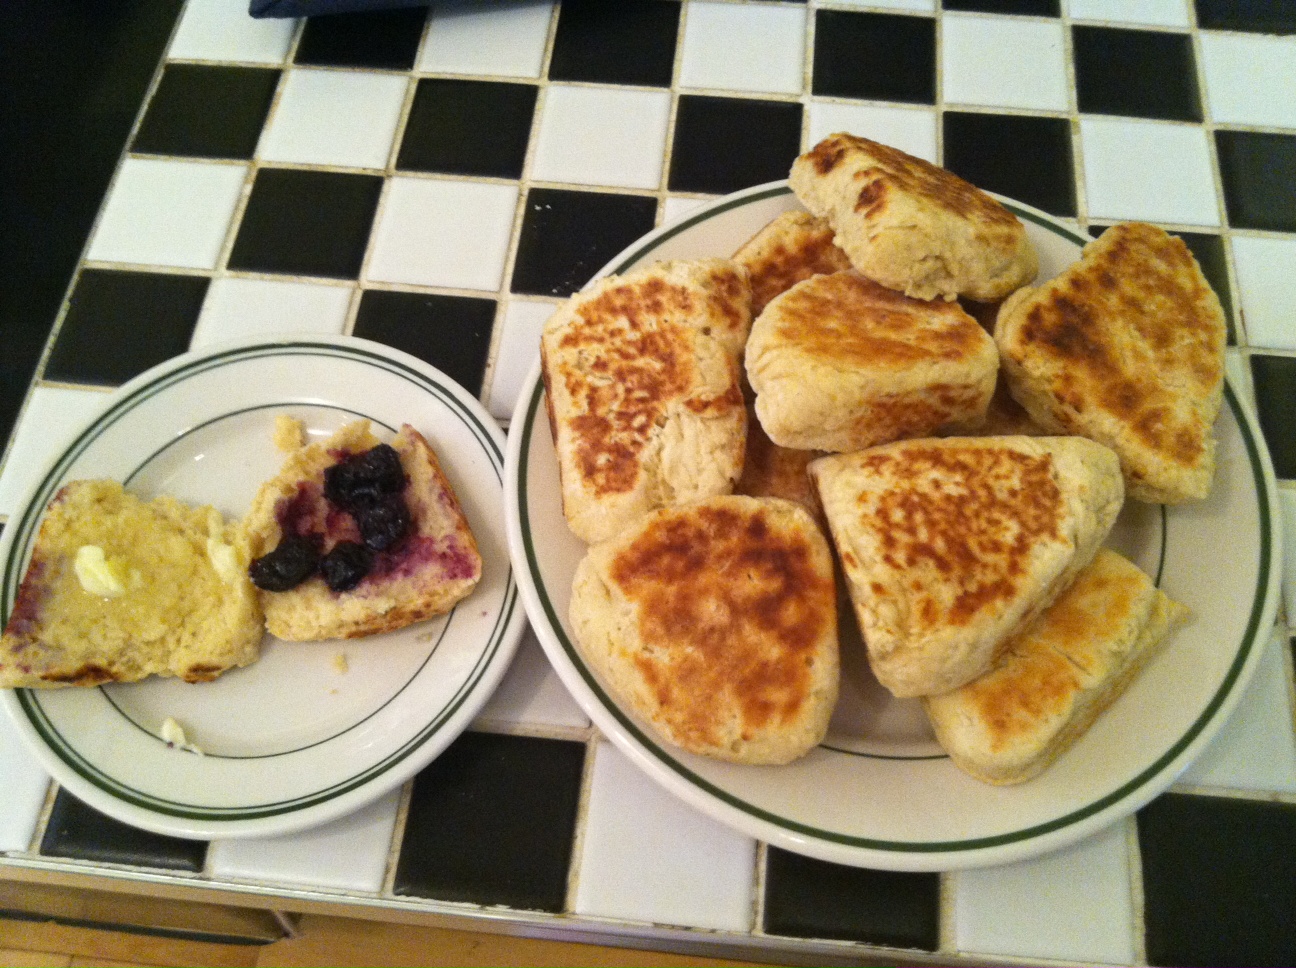
By now you know that, with few exceptions, everything I do on this blog is down-right, unapologetically old fashioned, homey, and New England (or Pennsylvania German) to the core. This morning for Sunday breakfast I reached way back to make these plain scones “baked” on a griddle, the way scones were meant to be.  You do need to tend to them, but it is all as simple as can be, and since they mix up in two secs, the whole process is done in 20 minutes. Buttermilk, as always, makes them tender and a bit tangy.

Stove-top Scones

These will have a nice contrast of textures between the insides and outsides. Go for something golden, a little on the darker side, like an English muffin. These are not sweet; I compensate by eating them with butter and jam. Makes 12.

2 ½ c a-p flour
1 T sugar
2 ½ tea baking powder
½ tea baking soda
1 tea salt
1/8 tea ginger (optional)
4 T unsalted butter
1 cup buttermilk (shake before measuring)
1 large egg


Put a seasoned griddle, preferably cast iron, on the stove over low heat.

Mix flour, sugar, b.p, b.s, salt, and ginger in a medium blowl. Cut the butter into small pieces and cut it into the dry ingredients with your fingers until crumbly.

Whisk the egg into the buttermilk and stir into the flour mixture with a fork until just combined. Turn the dough out onto a lightly floured board and divide it into three pieces. Form each piece, kneading lightly, into a small circle, about 6” diameter but no less than ½” thick. With a sharp, floured knife, cut each circle in quarters.

Place the wedges on the griddle; they should be dry from the flour on the counter, and you do not need to grease the griddle unless you want to. Cook them for about 3 minutes, then turn the heat up to medium and continue cooking them for another 3-5 minutes, or until they have risen and the bottoms are the shade of golden you prefer. Turn them over with a spatula and cook until the other side is golden, 6 minutes or so. With your hands or a pair of tongs, turn the scones to one edge and cook for about a minute; repeat with the other edges until scones are cooked all around.

Serve hot with butter and jam or marmalade.


Tuesday, July 1, 2014

Local in Rhode Island: Italian Rules


I am back in Rhode Island, and some things never change. This past week, our twice-mayor (6 terms in bundles of three)—and twice-convicted/once jailed-- talk show host, and pasta sauce entrepreneur Buddy Cianci announced he will run for another mayoral term. The legislature voted calamari the official state appetizer. Note the themes: food, corruption, Italian.

So for my son’s birthday I made a typical Rhode Island Italian meal. I was going to do the squid, but forgot to get it on my shopping trip, so for appetizers we had some Italian cheeses, some perfect melon and imported San Daniele prosciutto di Parma, and some wild shrimp with an orange-mustard-tarragon sauce. And Americanos for drinks. For the main course, for a special dinner in Rhode Island Italian world you want to start with some giant veal chops from Venda Ravioli (Costantino’s). I cooked them on the grill and served them with a little roasted garlic and sage butter, accompanied by grilled veggies (red peppers, zucchini, yellow crookneck, and radicchio) with reduced balsamic and thyme, and a very Rhode Island jonnycake polenta. A nice Fossacolle Rosso de Montalcino. Had to buy dessert (horrors) because the cooking equipment I’d ordered to make a cake was inadvertently shipped to Arizona. But it was good. 

So I just said that some things never change, but, you know, some do. I am not in Little Compton this summer. I’m on Conanicut Island—Jamestown—in the middle of Narragansett Bay between Newport and the mainland, or as we say here, between West and East Bay. As master of the neither here nor there, the generally at sea, I am perhaps unsurprisingly right at home. It is, after all, almost as old a Rhode Island settlement as Little Compton, and still Newport County. A short sail away.

Rhode Island Jonnycake Pan-fried Polenta

I used Kenyon’s meal for this; you can use any of our RI stoneground white flint cornmeals. You can, of course, serve the cooked polenta soft, with butter and parm, or tomato sauce and/or some sausage and mushrooms. Serves 4.

1 cup RI johnnycake cornmeal
4 cups water, approx.
2 T butter
2 tea salt
Freshly ground pepper

In a 3-qt saucepan (nonstick is useful if you have one), whisk about 1 ½ cups water into the cornmeal, then whisk in the additional 2 ½ c water. Bring the mixture to a boil over medium-high heat, stirring fairly continuously. It will begin to thicken rather quickly. Be careful not to splatter yourself as it reaches a boil. Stir in the salt, butter, and pepper. Reduce the heat and let it simmer/heave for about 45 minutes; it will have the consistency of mashed potatoes, and pull from the bottom of the pan.


If you plan to pan-fry it, pour the polenta into an ungreased glass pie plate or 8” square pan. Let stand for about ten minutes, then cover with plastic wrap and refrigerate until firm—a few hours, or overnight. Cut into wedges, squares, or diamonds, dredge lightly in seasoned flour, and fry in a little olive oil or butter or olive oil until nicely golden. Serve immediately. 


Sunday, May 18, 2014

Artichokes: Grilling the Globe


The opposite of the baby artichoke is the giant globe. Years ago when I lived California, artichokes were a plentiful and relatively cheap staple, and were common on the restaurant menus and friends’ tables. I lived not too far from Castroville, the “artichoke capital of the world,” and would go to the annual fair and eat them, large and small, every which way. I took them rather for granted.

Since then—and it has been a very long time—I have largely bought artichokes when they looked particularly good, and were at a particularly good price, in the market. This was not all that often. When I lived in Nashville, I discovered a grilled artichoke at Bricktop’s that became one of my mainstays in that otherwise food-bereft and regressive Deep South town. Bricktop’s is a chain, which tells you something about the food scene in Nashville at the time, but it was a good, reliable place, and it and its grilled artichoke became something of a comfort to me during my years there. I would often stop in after teaching late—until 7:30 p.m.—on a Thursday night, the end of my teaching week, and order a grilled artichoke and a glass of red wine. That grilled artichoke, served with melted butter and remoulade (they have since switched to aioli, apparently), remains for me the gold standard of grilled artichokes.

So of course, I try to make mine taste just the same. While I don’t have their superhot restaurant grill, I can come pretty close. Here is how to do it, using globe artichokes purchased for $1.00 each at my local supermarket. They are a sign or spring. Like the gila monster, who comes out around the same time of year, and has similarly vicious tendencies in its natural state

Grilled Artichokes with American Remoulade

I like to have an artichoke all to myself, and make a meal out of it. If following with a steak, half an artichoke per person will do. And you can dip it into anything creamy mayonnaise-based sauce that suits your fancy: aioli, lemon mayo, ranch dressing, or this Americanized version (minus capers and cornichons) of remoulade. Just be sure you make it fresh.

1 artichoke per person                


Lemon juice
Flour

Olive oil
Salt and pepper

American Remoulade

1 cup mayonnaise, preferably homemade
1 1/2 T mixed tarragon, parsley, chervil, chive; the tarragon and parsley are essential
1 T Dijon mustard or more to taste
1 anchovy filet, mashed, or 1 small garlic clove, crushed
1 tea minced shallot
Drop or two Tabasco sauce
1-2 tea lemon juice to thin
Salt and pepper

Lemon wedges
Melted butter


Trim the stems of large artichokes to about ½” and remove any loose lower leaves. Using a sharp knife, square off the top of the artichoke, cutting across the top spines, and then, using sharp kitchen shears, cut off the tops of the other leaves, removing all spines.  Put a few inches of water in a 3-4 qt saucepan with a lid, add a little lemon juice and a sprinkling of flour, and place in the artichokes, stems down, so the artichokes are touching and remain upright. Bring to a boil, covered, then reduce the heat and steam until you can pierce through the center straight to the bottom with a sharp knife, about 15­-20 minutes. Do not overcook.

Remove, allow to cool, then cut in half vertically. With a spoon, remove and discard the fuzzy choke. Combine all the remoulade ingredients to taste and set aside.


Brush the artichokes with olive oil seasoned with salt and pepper.  Grill face-down on a hot grill for 5 minutes; turn to grill  for another 3-5 minutes, until nicely charred. Serve with lemon wedges, the sauce, and some melted butter or more olive oil mixed with salt and pepper for dipping.


Sunday, March 16, 2014

More Bread: Poolish Makes Perfect


Continuing with the Forkish book, I tried another bread, on a day with no expectation of power outage at baking time. This one was what he calls his "Harvest Bread with Poolish." The recipe calls for 10% whole wheat, for which I substituted organic pumpernickel, and 5% wheat germ and 2% wheat bran; I used all wheat germ, or 7%. I seem to like more hydration, or maybe I was a little sloppy when adding water, so increased that too—probably to 80%. This dough is about 50% poolish. Interesting.


Poolish after 13 hrs
The bread is just as Forkish describes: buttery and aromatic. It is soft, flavorful, with a moist open crumb and a nice crisp crust. In addition to being very good, this bread suits my lifestyle, at least on weekends. You mix the poolish at 6:00 pm, leave it on the counter overnight, mix the dough at 7:00 a.m. next morning, and bake around 10 a.m. A couple of folds early in bulk fermentation.  A total breeze. Much more convenient, and better taste and texture, than the Saturday Bread.

In fact, I am a little worried about just how easy and convenient. Bread like this is just about the best thing to have for breakfast, toasted or not, with butter, and jam or not. And just about the best thing to have for lunch, with a good cheddar or gruyere.  And just about the best thing to have for dinner, with a salad or some sautéed mushrooms and wine. Or both. Pretty soon you’ve eaten half a loaf in a day. Half of a two-pound loaf, that is. Yikes!

Thank goodness I have friends who like bread. 


Wednesday, March 5, 2014

Can’t Buy Me Bread


Last Fall the local French bakery, run by a young French couple, closed shop and, with it, their stand at the farmer’s market where I bought my bread, and moved onto the more appreciative climes of LA. That left what I consider to be the only worthy bread baker, but his business model doesn’t suit me: you have to remember, on Friday morning, to go online by 7:00 and wait for him to post the bread offerings for ordering and then pick-up the next day—at another prescribed time, 11:00 a.m.—at a different, less convenient local farmer’s market. If you are a little late, what you want may be sold out. Then of course you might forget to pick it up, if you, like me, get up early and are already well into your day by 11. Pity those who like to sleep late, too! They would have to set their alarm to order bread.

So while I have done this a few times, and it may all seem so quaint and local at first blush, I quickly tired of it. There was a tendency to feel like you had to order bread while you could, resulting in your buying too much—or settling for a bread you don’t really want if others were already taken. And of course, even when you set your phone alarm, missing either the ordering or the pickup for one reason or another. To say nothing of the somewhat soup-Nazi quality of the baker, complete with long—yup—bread lines for pickup. Not for me.

I absolutely adore bread, carbohydrates be damned, and from time to time over the course of the last 40 years or so, have made my own bread on a regular or semi-regular basis. Bread books take up a full shelf in my very large cookbook collection, and I can’t resist a new one (or a new old one if I come across something forgotten but interesting), and recently added the Forkish book after reading a lot of praise. I have several artisan books, so there’s not a lot new here, more of a synthesis, and I don’t know if it will become a favorite—won’t know ‘til I try the levains. But trying the first simple bread gave me a story to tell, so here it is.

Finding myself with a free day—amazingly, having finished project grading early—I thought, why not stay
home and bake bread? The whole thing is so simple that I had a lovely, relaxing day, reading and puttering between stages. I used a local Arizona heritage grain flour from Hayden Mills, mixed with a little first clear flour and dark rye, and adjusted the hydration to 80%. This was going to be good!

When the dough was perfectly proofed, I was just about to put it in the oven when: the electricity went out. Which means, of course, my oven did too.

I waited a few minutes—maybe this was just a blip?—but no. I looked out—everything, the entire city, was in the dark; we had been having a wild storm all day, the first rain in months. I put the proofed dough in the refrigerator. The oven went cold. Forty-five minutes later, the electricity came on, and I pre-heated the oven again.  By the time it was ready, my dough had spent about over an hour in the fridge, and it had suffered by becoming a little overproofed despite the cold. I knew what that meant.


aving

They say every cloud has a sliver lining. Here is a golden one, complete with rainbow, snapped from my patio while waiting for the lights to come back on. And here is the bread. Worth another try.


Wednesday, January 1, 2014

The Last Supper: In Memoriam


The last meal of the year should be special in some way, and I always make myself something of which I am particularly fond, like a good veal chop or an old-fashioned London broil; something symbolic, like lentils; or something I don’t often have time to do, like a classic lobster bisque with a New England twist.  Whatever it is, it is something comforting. This year, as all you true foodies know, was a year of lost luminaries in the food world, and two in particular, Marcella Hazan and Judy Rogers, were old kitchen friends of mine. What to make in memoriam for the year and these women whose food has comforted me and millions over many years?  I will save Judy Rogers’s roast chicken with bread salad for another tribute meal, soon. Marcella and I go way back, and it is one simple dish—spaghetti with smothered onions—that I have made and loved scores of times, that seems the perfect punctuation for the year, and the perfect emblem of the genius of Italian cooking.

After the news of Mrs. Hazen’s death, when everyone was talking about their favorite dishes, I realized that I had really learned to make Italian food from her books, The Classic Italian Cookbook and More Classic Italian Cooking. This actually came to me as somewhat of a shock, because I had literally internalized so many of the recipes that I scarcely open the books anymore, which I bought when they were first published by Knopf: 1976  and 1978, respectively—I was still in my 20s! I had completely forgotten, for example, that I learned to make pizza, which I made every single Friday night for more than 20 years, and still do often, from her second book. I still make my dough, and my sauce, the same way. I could list dozens of dishes that are just as second-nature, and just as frequently made.

Marcella Hazan once said, “"I am never bored by a good old dish and I wouldn't shrink from making something that I first made fifty years ago and my mother, perhaps, fifty years before then.”  I couldn’t agree more.

Happy 2014. Eat well, and stay healthy.

Spaghetti col Sugo di Cipolle
(Spaghetti with Smothered Onions)

I have made only one minor change to this perfect recipe, indicated below. It contains lard, which you all know I adore; you can substitute butter or use all olive oil if you must. But do try the lard in Mrs. Hazan’s honor. Serves 4-6 as a first course.

1 ½ T lard
5 T extra virgin olive oil
1 ½ lb sweet onions, liced very thin
Salt
Freshly ground pepper
Freshly grated nutmeg (my addition; optional)
½ cup dry white wine
2 T chopped fresh parsley
1/3 cup freshly grated Parmesan

Heat the oil and lard in a large sauté pan; add the onions, cover, and cool over very low heat for 45 min or more, til soft.  Uncover, raise the heat to medium-high, and cook until golden brown, scraping with a wooden spoon occasionally. Sprinkle liberally with salt and pepper, and a whisper of nutmeg. Add the wine, raise the heat, and stir until the wine has boiled away and you have a golden, creamy-looking mass. Stir in the parsley and remove from the heat.

Cook the spaghetti until firm—about 10-12 minutes. Reheat the sauce gently. Drain the pasta and add to the sauté pan; raise the heat and toss for a minute. Serve with the grated cheese, tossing lightly. You can also have a little garlic bread, really a bruschetta, the way Mrs. Hazen directs: toast the bread lightly; rub with a smashed clove of fresh garlic; and drizzle fairly generously with olive oil so it softens nicely. Mangia!


Friday, December 27, 2013

Catching Up On Christmas

Sometimes the holidays sneak up on you—or rather, you are able to disregard their advancing pace—while you are getting your work done. I have gotten good at that—simply not thinking about Christmas until, well, I can: until all the grades are in, and I’ve given myself a day to recover. This seems to be a little later every year, as judged by the dwindling number of types of cookie I manage to make. This year, only two. Will there be, in some not too distant future, a cookieless Christmas? Or will I retire, and once again be able to bestow (to the worthy, of course, and assuming I still had the energy) tins bursting with an assortment of my critically collected, carefully curated favorites?


Time will tell what cookies lay in my—and your--Christmas future. But for 2013, Christmas was simple all around.  No fancy dinner like last year or so many others. In fact, Christmas Eve this year was almost like a weeknight supper—homey, comforting, easy-peasy, special only in that it was a little rich for nowadays. You all know this old-fashioned meal very well: a glazed ham (with a sauce made with preserved Little Compton sour cherries); scalloped potatoes; roasted cauliflower with hazelnut buttered bread crumbs; a Christmasy red and green salad. A deep fried appetizer, cheddar cheese puffs, for a little festivity, with champagne. My favorite chocolate cake for dessert, which we did not eat until last night, as it turned out. All in all, a pretty good dinner for a Christmas Eve that arrived early, or to which I arrived late. 

I hope you had a happy holiday, whenever yours began, and that you had time to make at least one cookie.


Scalloped Potatoes


Something creamy for Christmas is always in order; something that can be assembled ahead is doubly so. Here is how I make scalloped potatoes, learned by watching my grandmother. Do not expect measurements(and none needed)! Serves 2-3.

2 large russet potatoes (I urge this  variety on you.)
2-3 thin slices from a large onion, chopped
Flour
Unsalted butter
Salt, freshly ground pepper, freshly grated nutmeg
1 ½ cups light cream or half-and-half

Butter a 1-qt gratin dish. Preheat the oven to 300 F.

Peel the potatoes and slice them very thin, about 1/16.” Place a layer of potatoes neatly into the dish; sprinkle with a little of the chopped onion;
strew lightly with a little flour from your hand; dot with a little butter; sprinkle lightly with salt and pepper and—sparingly—nutmeg. Repeat, filling the dish to within about ½” of the top.  You will use about 1-2 T each of butter and flour in all, but don’t measure, just use your judgment and keep a light touch with the flour.

Barely scald the cream and pour it over the layered potatoes; press the potatoes down lightly with the back of a wooden spoon. Bake about 1 ½ hrs (the cream will bubble up) until golden.


Wednesday, November 13, 2013

National Indian Pudding Day


Lest it pass you by, I come briefly out of blog hiatus to give a shout out to Indian Pudding.  I knew it had its own day, being from the land of its provenance, but I suspect that you were shamefully unaware. So now you know. Today is National Indian Pudding Day, and if you have never had it, do try. It is one of the many items that uses our wonderful jonnycake cornmeal, and there is a recipe right here on this very blog—omg, posted five years ago—that you can use. If you're not sure which cornmeal to choose, I refer you to this completely scientific comparison.


There is even a story on NPR about it. It says that interest in New England cooking is on the upswing. As usual, I seem to have been ahead of my time (always have problems with timing); guess I should get back to this….but when??

[Indian meal baked[2].jpg]

Thursday, July 25, 2013

C3: Corn to the Third Power


I’m a eating a hot meal for the first time in almost two weeks—at least, the first time cooked in my own cottage kitchen, which has been an oven in and of itself.  It’s gone from HHH—the abbreviation every New Englander knows, Hazy, Hot, and Humid—to TDCWFJ—that’s my own abbreviation for too damned cold and wet for July. Of course, it’s only one day, and I do not expect—are you listening, weather gods?—it to last. But I am already wishing for the heat back. Except for the fact that I was able to turn the real oven on today.

I would like to report that I was baking a cherry pie with, finally, the Montmorencies. But I totally missed them. For the first time in…well, forever!  It was that perfect storm of not being here on the ONE day when they were picked. But I don’t think I really missed much. The fruit lady said they were fermented. Cherry wine, anyone?  They had never seen it before.  Waited and waited to pick them because they were not ready, and then when they were…they were already gone. A strange year.

But the blueberries are in. And you can be sure there is a pie in our future.  But for today, in the cold, when I have on a pair of jeans and a sweatshirt for god’s sake, and just pulled out a pair of socks, I kid you not (note that I have them with me: it’s New England, after all), I turned to the comfort of corn.

While I’m still waiting for my favorite varieties, Temptation and Lancelot, to appear, the corn is good, and this was a variety I have never seen at Walker’s or really anywhere before, Illini. I bought a few ears, and was planning to cut it off the cob (which I did) and sauté it (which I didn’t), but ended up going out with a friend and having—gasp—a bowl of cut corn more than an hour old. That’s tantamount to sin in Yankee religion.

So I decided to make some cornbread. Even though I am, thanks to the wonderful Rachel of the equally wonderful and evocative Lawn Tea blog, an honorary G.R.I.T.S. member (and let us never forget that I did serve three years hard time in Nashville), I rarely make cornbread.  I don’t like the dry, crumbly sort,  the kind that you can slather to death with butter and still choke on on the way down. I imagine it’s really good for stuffing a bird, able to suck up all those juices without totally falling apart. But then, I don’t stuff my birds—we do dressing, baked on the side.  And I don’t like the sweet sort, the yellow, sugary stuff that is the staple of middling restaurants. I don’t like the over-stuffed sort, much as I don’t like pizza with tons of toppings, or ice cream with, god forbid, candy and cookies and nuts and swirls and…please stop!  Hold the chiles, the cheese, the bacon: don’t you know that cornbread, like pizza and ice cream, should be pure?

I am no corn bread maven. But a lot of corn, in its various forms, makes for a good corn bread. Hence the name.  Since I don’t like it dry, I make it moist. And since I don’t like it sweet, I make it…just sweet enough to balance the acid edge.  It can be eaten plain, without butter (enough fat in it). It stands on its own for breakfast. And that, for me, is the ultimate test.

C3 Cornbread

This will sit nicely on the counter for a few days with little damage. What more could you want? As with all moist foods, the microwave at low temp does a nice job of reheating, but it scarcely needs it.  The yellow cornflour gives a  yellow color when you use white cornmeal; white cornflour can also be used. Serves 12 generously.

2 c a-p flour
½ c stoneground yellow cornflour (I use Bob’s Red Mill, or a noname white version from the supermarkets          here)
1 c stoneground white or yellow cornmeal (I use RI jonnycakemeal)
2 tea baking powder
1 tea baking soda
1 tea salt
3 T brown sugar
2 T pure maple syrup
½ cup unsalted butter (1 stick), melted
2 large brown eggs
¾ best sour cream
1 cup whole milk
Cut kernels from 2 ears of fresh corn (about 1 cup)
Additional maple syrup for brushing top (optional)

Preheat oven to 350F. Butter a 13x9” baking pan, preferably a nice one for serving, and set aside.

Mix the flours, cornmeal, baking powder, soda, and salt together in a large bowl. In a medium-size bowl, whisk the melted butter, cooled a little, with the sugar and syrup. Whisk in the eggs, then the sour cream, then the milk. Fold into the dry ingredients just until the flour disappears, as for a biscuit. Fold in the corn kernels, which you have cut off and scraped a little from their cobs (freezing the cobs for corn stock), until just distributed. Scoop into the prepared pan, and spread around with the back of a wooden spoon.


Bake for 30-40 minutes, depending on your oven (mine in LC is HOT!), until lightly browned all over, a little more so on the edges, which may just begin to pull away. The top should spring back to the touch, and you can always stick a skewer in to make sure it is cooked through.  Remove to a rack to cool, and brush lightly with maple syrup if you wish.


Friday, July 19, 2013

Miraculous Mint: Always in Style


It is hard to believe that, not so long ago, just about every recipe called for dried herbs. It was unheard of to see fresh versions of even the most commonly used herbs—basil, oregano, sage, thyme—in the stores. “Exotics” like tarragon were unheard of period until the late 70s or, in many locales, the 80s.
But mint, fresh and fragrant, was somehow always there.  In the lemonade and the iced tea. Fresh.

I am guessing that this rare example of herbal freshness is because mint was practically a weed: it was just there. It grew everywhere, and “took over”:  most people pretty much considered it a pest, and would dig it out save for a tiny bit for, you know, the lemonade.  I could not understand this. I loved its looks, its feel between the fingers, its scent of course, the amazing fact that you could just pick and chew on the leaves, and they were minty great. I loved the way it took over.

In a paradoxical reversal, mint is actually now hard to find. Yup, it’s been dug up.  If you do see it in the store—rarely—it is a sad flattened little bunch stifled and browning in a plastic tray. Why is it that we can now have big bunches of cilantro, basil, Italian parsley, and bushy gatherings of rosemary on a regular basis, but not mint?  I am guessing that it is something that doesn’t really take to greenhouse cultivation. It wants to be wild—run rampant. Most farming doesn't work like that these days.

So if you want it, you need to have your own taking over the backyard, or live by a local farmer.  Sometimes you see it in international markets. But I know you know what I mean when I say that making tabbouleh or anything else that calls for a good load of mint can be a challenge.

Coll grows it, and is generous with it, as he is with his other bunches of herbs (many herb prices in stores are, in a word, ridiculous). The beetles have, apparently, been at it these past days, so when I arrived at the stand there was none out for sale. I really wanted some, so one of the farm stand girls kindly went out and cut me some, picking through and harvesting the best un-eaten stems. I got enough, and paid a dollar for it.

Thinking about the ahead-of-its time abundance and present-time scarcity of mint quite naturally brought on a little food nostalgia.  This salad is a reminder of the virtues of an untidy summer lawn, shot through with marauding mint. Was there ever a more effortless and neglected gift to the suburban table?

Jellied Mint, Tomato, and Cucumber Salad

The mint “jello” is superb: try it. It would also make, on its own, a wonderful palate cleanser between courses or a light summer dessert with some ripe berries and cream. Serves 3-4.

The jelly

1 big bunch of freshly picked mint, enough to for 1 cup loosely packed chopped mint; reserve some nice leaves for garnish
2 packages plain gelatin (and a little cold water to soften it)
2 cups boiling water
2 T sugar
1 tea freshly squeezed lemon juice
½ tea salt
¼ cup mild vinegar (cider, white, or white wine)
¼ cup white wine (or use a ½ cup vinegar)

In a 1-qt saucepan, put the gelatin and add just enough cold water to soften it; let it sit about 5 minutes. Meanwhile, stem the mint, stack the leaves, and roughly slice/chop it. You will need about 1 cup, loosely packed.

Add the boiling water, sugar, maple syrup, salt, lemon juice, vinegar, and wine (if using) to the pan; keep it warm over medium-low heat. Add the fresh mint, stir, and let it sit on the heat for 20 minutes or so, stirring and tasting it occasionally. Add a little more sugar if needed. It will taste a little acid at the beginning, but will mellow as it steeps.

Strain the mixture into a big measuring cup and discard the leaves. Rinse a 9” or 10” pie plate with cold water.  Pour the liquid into the pie plate and refrigerate until set.

Dressing

Use any sweetish dressing you like. I used:

1 T finely minced sweet onion
¼ c olive oil (would have used vegetable oil, but had none)
2 T cider vinegar
¼ tea salt
1/8 tea black pepper
1 ½ T thick local heavy cream

Whisk all together until thick.

To assemble the salad

The mint jello
1 medium nice local tomato
1 medium cucumber
The dressing
Mint leaves

Core and seed the tomato and the cucumber and chop them into large dice. Turn the jelly out onto a board and dice it; if you have trouble turning it out, cut the jelly into squares with a sharp knife in the pan, and remove them with a spoon. Arrange the jello and vegetables on a plate. Nap with a little whipped cream dressing and garnish with mint before serving; if you can, set the salad in the refrigerator for about 15 minutes to chill.