Showing posts with label buttermilk. Show all posts

Sunday, June 28, 2015

Back in LC: Buttermilk III


Actually, I’ve been back in Rhode Island for just over a month now, but just got down to LC, where thoughts turn to baking and guilt about my on-life-support blog.  A few friends from here have mentioned it, subtly (as in, “I haven’t seen the blog in a while”) or not so subtly (“Are you going to do the blog now that you’re here?”). So here I am, sending this out to my few but fierce believers, after a month lolling about like a slug.

Which I totally needed after a horrific academic year, and six-months-and-counting of recovering from the dreaded (as in, do not get this injury) trimalleolar fracture.  Bones healed perfectly (“like a 20-year-old!!” surgeon crowed). Yeah, but all that other stuff—you know, the stuff that actually lets you walk—ligaments, tendons, muscles, nerves—a massive contractured, painful, scar-tissued mess. A metal plate with nine screws and a 4” bolt are the least of it.


But I can now stand and limp around crutch-free for short distances well enough to bake. And I must say that I do have some personal pent-up demand to break out the rolling pins and pie plates, after more than five months of being pretty much incapacitated.


By now you know that, with few exceptions, everything I do on this blog is down-right, unapologetically old fashioned, homey, and New England (or Pennsylvania German) to the core. This morning for Sunday breakfast I reached way back to make these plain scones “baked” on a griddle, the way scones were meant to be.  You do need to tend to them, but it is all as simple as can be, and since they mix up in two secs, the whole process is done in 20 minutes. Buttermilk, as always, makes them tender and a bit tangy.

Stove-top Scones

These will have a nice contrast of textures between the insides and outsides. Go for something golden, a little on the darker side, like an English muffin. These are not sweet; I compensate by eating them with butter and jam. Makes 12.

2 ½ c a-p flour
1 T sugar
2 ½ tea baking powder
½ tea baking soda
1 tea salt
1/8 tea ginger (optional)
4 T unsalted butter
1 cup buttermilk (shake before measuring)
1 large egg


Put a seasoned griddle, preferably cast iron, on the stove over low heat.

Mix flour, sugar, b.p, b.s, salt, and ginger in a medium blowl. Cut the butter into small pieces and cut it into the dry ingredients with your fingers until crumbly.

Whisk the egg into the buttermilk and stir into the flour mixture with a fork until just combined. Turn the dough out onto a lightly floured board and divide it into three pieces. Form each piece, kneading lightly, into a small circle, about 6” diameter but no less than ½” thick. With a sharp, floured knife, cut each circle in quarters.

Place the wedges on the griddle; they should be dry from the flour on the counter, and you do not need to grease the griddle unless you want to. Cook them for about 3 minutes, then turn the heat up to medium and continue cooking them for another 3-5 minutes, or until they have risen and the bottoms are the shade of golden you prefer. Turn them over with a spatula and cook until the other side is golden, 6 minutes or so. With your hands or a pair of tongs, turn the scones to one edge and cook for about a minute; repeat with the other edges until scones are cooked all around.

Serve hot with butter and jam or marmalade.


Sunday, September 2, 2012

Pie: Buttermilk, Blackberries, Birthday


For those of you who are surprised to see a post from me now that school has started and I have even warned of my hibernatory hiatus from these pages, don’t get too excited, or expect me back anytime soon.  I started this post a month ago. My pie—my birthday pie!—went awry.  So I postponed this post until I made it again. I really wanted you to have this simple but superb and unusual recipe. I cannot remember where I got it—possibly from a coworker in California in the 1970s, where I picked up my recipe for shortbread, for black walnut cake, for chiles rellenos and a few others. I’m not really sure, but I am sure that this pie is worth making over when you forget to add the butter. Which is what I did.

I was, of course, talking on the phone, the little rectangle with the rounded corners (we now all know what that means) scrunched between my shoulder and ear. Honestly, I cook and talk on the phone all the time. But now that I think about it, I have had another baking omission while on the phone; years ago I left the sugar out of a cheesecake, which I was making to take to a party. I didn’t realize it until I served and tasted it--and came home to find the sugar measured out on the counter. This time I didn’t realize it until I looked into the oven and saw the top of my pie blown up like a balloon and really dark, almost burned—it is always dark, but this was something else—and saw the melted butter sitting forlorn in its little pot on stove.

Both times, happily enough, the final product was interesting. I am almost tempted to leave the butter out of this pie again—the filling separated, much like an old Pennsylvania German favorite of me, my mother, and grandmother, lemon cake pie (I’ll make it for the blog sometime), and it tasted really good.  Hence the photos of two pies, and two slices of pie. The one with the blackberries is the butterless attempt; the one with raspberries is the “correct” one.

Below is how I started off my post on buttermilk, blueberries, and birthday a month ago, when I was still in LC. What a difference a month makes. Or a stick of melted butter.

********

I do love alliteration. And of course, pie. And berries of all sorts. And dairy. So it all came together last week on my birthday. As a child I always asked for pie on my birthday—apple, to be precise—and now that I make my own birthday desserts, nothing much has changed except for the kind of pie itself. I’m more likely these days, when my favorite local apples are not yet in but we are still enjoying berry season, to make a blueberry or mixed berry pie. This year, not really thinking about making a pie, I picked up a cup of blackberries and on the morning of my birthday I thought, what would this make a nice garnish for? A traditional custard pie, of course. Or a lemon curd tart. But I had buttermilk on hand (as always) and wanted to use it up before I leave LC (sadly, time to think about that). So an old-fashioned buttermilk pie, a tangy riff on a chess pie, seemed a good and practical match for the blackberries.
 
Buttermilk is, of course, not what it used to be; it’s not really the milk from churning butter. It’s more of a constructed product. But it is good in its own way, a kind of light, liquid sour cream.  It is great stuff for dips and salad dressings, for marinating chicken, for making tender cakes. I don’t drink it. But then again, I don’t drink milk either, and never did. Ever.
 
But milk transformed is one of my favorite things, and this is a favorite pie.


Buttermilk Pie

The baking time on this pie will depend greatly on your oven. Watch it, and use your judgment.  It should not be jiggly, but only just firm. Test as you would a custard, by inserting a knife half-way between the center and the edge. Serves 6.

Pastry for a 10” pie plate or 9” deep dish pie plate. You can make an all-butter pastry or make one with 1 ½ c flour, a big pinch of salt, 6 T butter, and 2 T lard or shortening, and cold water to bring it together.

1 c sugar
3 T flour
¼ salt
3 eggs, separated
2 c buttermilk
2 tea pure vanilla
8 oz (1 stick) butter, melted and slightly cooled

Preheat the oven to 425 F.

Line the pie dish with the pastry and chill in the freezer. Mix the sugar, flour, and salt and set aside. In a large bowl, beat the egg yolks and whisk in the dry ingredients. Add the buttermilk, vanilla, and melted butter, whisking til smooth. Beat whites stiff but not dry and fold into the custard mixture, blending well. Pile the filling into the chilled shell. Bake the pie at 425F for about 15 minutes, covering the top with a sheet of foil if it gets too brown; reduce to 325F for another 25-30 minutes, until the pie is golden and a knife inserted midway comes out clean.

Let the pie cool on a rack. I prefer this pie at warm room temperature. Do refrigerate leftovers, but take it out of the refrigerator 20 minutes or so before eating them to take the chill off and get the texture back to the way it should be. Serve plain or with fruit.


Saturday, August 28, 2010

Blackberries and Blueberries: Blintzes

 OLYMPUS DIGITAL CAMERA             OLYMPUS DIGITAL CAMERA


When I arrived back in Nashville this August I met a friend for breakfast at Noshville, the closest thing in Nashville to a Jewish deli-restaurant (not deli as in place to buy all your cold cuts, salads, hard rolls, bialys, rye breads, pickles, and cheesecake, because that doesn’t exist, but deli-type restaurant à la the Carnegie or Stage in NYC). They have H&H bagels! I never order them—they can only have been frozen, I figure, or at best Fed-Exed, and I do like mine warm and fresh from the store when I’m in NYC—but laud them for going to the trouble. What I order, without fail, is the blintzes. Only once have they been off the menu, when farmer’s cheese was nowhere to be found. Noshville serves their blintzes with sour cream and a somewhat gloppy and sweet but pretty decent blueberry sauce. The blintzes themselves are homemade, and they are good.

So I don’t usually make blintzes at home. But this week, a confluence of events and ingredients just begged for me to make them. I had bought some blackberries at the farmers market—the season was brief, due to the heat and humidity in August—and then saw, to my surprise, some wild blueberries that the people selling them had no idea where they came from except that “a Mexican man” brought them to them. These blueberries were the best I’d ever had—and that is saying a lot considering where I come from. Sweet and spicy, with true blueberry flavor. I thought I’d make a pie.

But then, while making room in the freezer (I froze some of these amazing berries, of course), I found a jar of crepe batter. Hmm, I thought, I really should use this. And then I opened the refrigerator and saw the left-over homemade crema from a Mexican luncheon this week—basically, homemade sour cream, made from the good high-fat heavy cream and buttermilk I buy at the farmers market from a Kentucky dairy farmer who drives down on Saturdays. I also had some of his whole milk, and thought I could make some fresh curd cheese. It was a confluence of signs, all pointing to one thing: blintzes. Here they are. Make at your own risk, as you may not be able to go back.

Black and Blue Blintzes

You can make these over the course of a few days. In fact, both the blueberry sauce and crepes (or crepe batter) will freeze well, allowing you to have them on hand to make blintzes on short notice. Serves 6.

CrepesOLYMPUS DIGITAL CAMERA

This is the batter I have been using since I was in college, and I’ve never found a reason to change it. It came out of Redbook Magazine in 1970, and this is it exactly except for changes in method. Makes about 14-16 7”crepes; freeze the extras.

1 cup sifted a-p flour
Dash salt
3 large eggs
1 ½ cups whole milk
Butter for frying

Combine flour and salt in a 1-2 quart bowl. In a small bowl, beat the eggs lightly with a whisk or electric mixer, then beat in the milk until well blended. Gradually add the egg-milk mixture to the dry ingredients, beating vigorously until smooth; it will have the consistency of heavy cream. Strain into another bowl or large measuring cup and chill 1-2 hrs.

To cook the crepes, lightly butter a crepe pan, preferably a well-seasoned iron one, and heat to medium high. Pour about 2 T of batter into the pan, tipping it to spread the batter evenly to coat, adding more batter if needed but keeping the crepe as thin as possible. Cook about 1 minute until the bottom is lightly speckled and the top looks somewhat plastic-y. Turn the crepe—I use an offset icing spatula to lift it from below the center and fold it gently over—and cook it for another 20 seconds or so. Crepes should be lightly browned.

The Filling

The filling is malleable—you can make it with farmer’s cheese, cottage cheese, store ricotta, cream cheese, your own fresh cheese, or a combination. Drain store-bought cottage cheese or ricotta well; some people add an egg yolk when using commercial cheeses, but it is not necessary if you use homemade cheese or farmer’s cheese. Makes about 2 1/2 cups.

2 cups homemade fresh curd cheese or true farmer’s cheese (see below for how to make fresh cheese) Blintzes cheese
8 oz Philadelphia® cream cheese, softened
1 T good honey, preferably wildflower
1/8 tea pure vanilla extract

Add the fresh cheese, breaking it up loosely  with a fork, or farmer’s cheese to the cream cheese and blend well. Stir in the honey and vanilla—you want only a hint of sweetness.

To make fresh curd cheese: Heat 2 qts of minimally pasteurized whole milk in a bowl in the microwave for 5-7 minutes, or until an instant read thermometer registers about 160F. Stir in ¼ cup cider vinegar; it will immediately form curds. Place a strainer, lined with cheesecloth or a coffee filter, into a large bowl. Ladle the majority of the curds into the lined strainer to avoid splashing, then pour in the rest of the curdy liquid. Let it drain for perhaps 10-15 minutes, until quite firm. You can save the liquid (whey) for use as your liquid when making bread, or discard it. Makes 2 cups.

Black and Blueberry Sauce

1 heaping cup blackberriesOLYMPUS DIGITAL CAMERA
1 cup blueberries
¾ sugar
¾ cup water
1 tea fresh-squeezed lemon juice
Pinch salt
Few dashes cinnamon or mixed cinnamon/clove
2-3 tea cornstarch

Put the berries, lemon, spice, salt, and sugar over low heat, stirring gently, until the berries begin to exude their juice. Add the water and cook, allowing it to bubble but not boil hard, until the sugar is completely melted and the berries are sitting in a light syrup but are still whole. Mix 2 tea of cornstarch with a little cold water, add to the syrup, and stir gently, still on a soft bubble, until the mixture has a saucy consistency; if needed, add another teaspoon of cornstarch mixed with a little water and cook a bit longer. Remove from the heat and cool. May be frozen.

Crema (Homemade Sour Cream)Crema

1 qt high-fat, barely pasteurized heavy cream                 
¼ cup good-quality buttermilk or natural plain yogurt with active cultures

Stir the buttermilk or yogurt into the cream in a glass jar and set it, covered, in a warm spot (on a gas stove is ideal). Leave it overnight; it should have thickened, but if not, leave it another 8 hours or more, then refrigerate, where it will further thicken to the consistency of sour cream, but will be lighter and creamier. Makes 1 qt.

Assembling, Cooking, and Serving

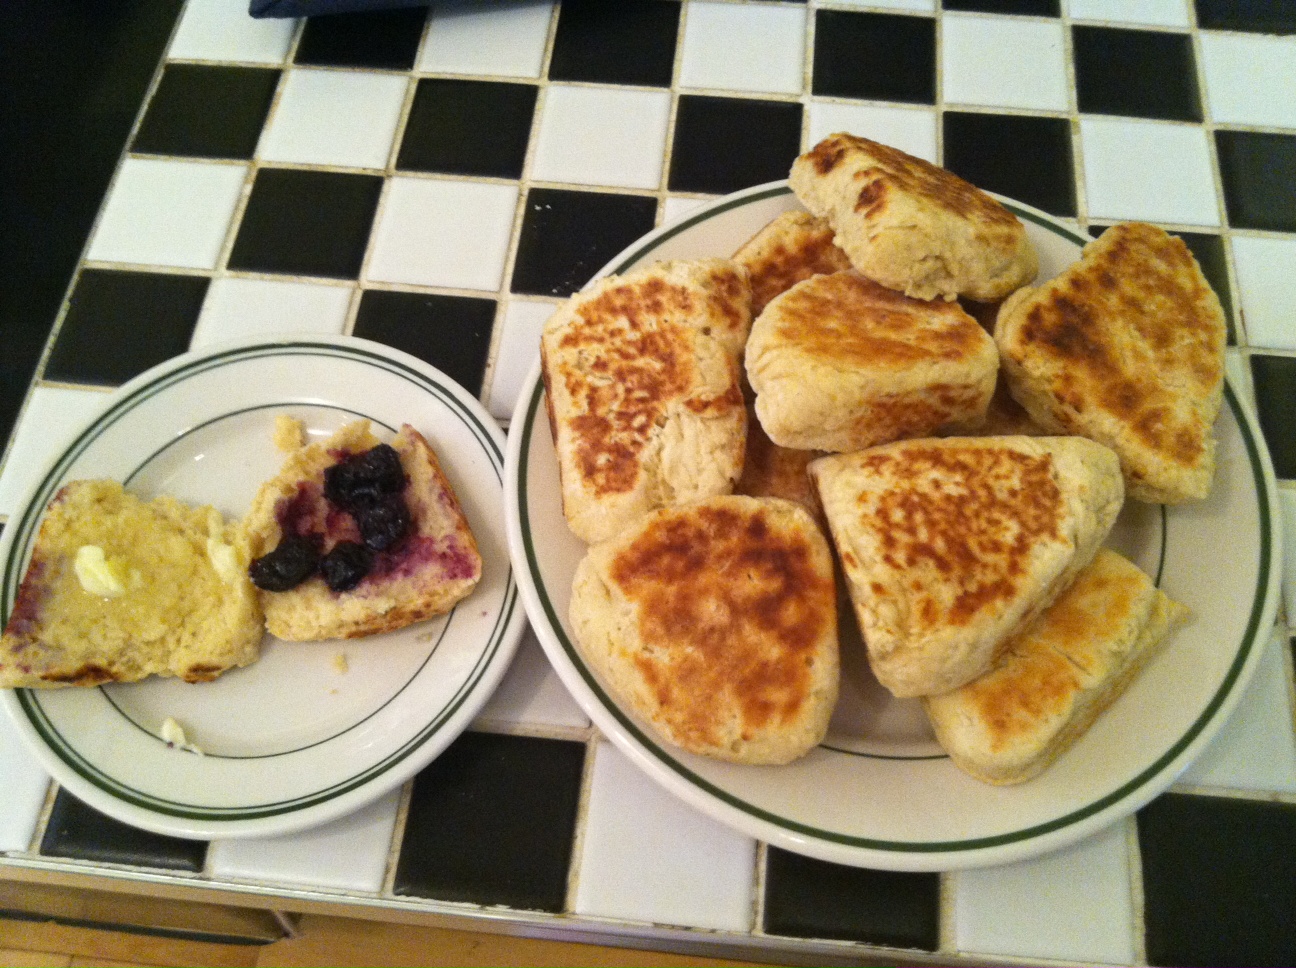
Place a crepe on a board, speckled side down. Place 2 tablespoons of filling in a neat column in the center of the crepe. Working from the side closest to your waist (bottom), fold the crepe up over the filling to the center, and fold the top down to meet it; try to enclose the filling without a gap. Then fold over the edge from the left, and roll toward the right, tucking the ends in well, until you have a neat package. Repeat with the remaining filling.

OLYMPUS DIGITAL CAMERA              OLYMPUS DIGITAL CAMERA              OLYMPUS DIGITAL CAMERA             Blintzes cooking 

Lightly grease a griddle or heavy pan. Place the blintzes seam-side down and cook until lightly browned; turn and cook the other side, tipping the blintz up onto its sides to brown those as well if desired. Remove to a plate and garnish with the crema and black and blueberry sauce.


                                                    Blintzes served

Sunday, October 26, 2008

Poblanos: Chile Charmer

OLYMPUS DIGITAL CAMERA             OLYMPUS DIGITAL CAMERA

There are absolutely gorgeous poblano peppers available now: just the right size—about 4” long and 3” wide at the shoulder--, perfectly conical or heart-shaped, glossy dark green-black. You might not go out looking for them, but they will charm their way into your shopping basket anyway, they are just so fresh-faced and spotless.

And you know that their beauty is more than skin-deep; there’s real substance there. Poblanos are meaty and rich-tasting with a mild-to-moderate flavorful, never raw or grating, heat. They have a medium-thick wall that holds up well when grilled, stuffed, or fried, but that allows them to be at home in gentler preparations, like stir-fries and soups. While I love the small, hotter Serrano for seasoning, the poblano is my idea of the perfect all-around chile pepper. It also is the source of my favorite (and again, the most versatile) dried chile, the ancho, an essential for earthy sauces.

SM Poblanos copy To prepare poblanos, broil or grill them, taking care that they don’t burn, until the skins are lightly charred and blistered all over; I use my toaster oven when doing just a few. Put them in a plastic bag or towel to steam for a few minutes, then pull and rub off the skins, and gently pull out the stem and attached seeds; it can be helpful to do this under running water, and to let the water flow into the chile to remove any escaped seeds. Pat hem dry or set them to drain between paper towels, and then they are ready to use. One of my favorite supper dishes is chiles rellenos, so I tend to make them over and over—and will share my recipe soon. I have already told you about the divine chile-relleno burger. And I often make corn soup with rajas de chile poblano (strips of poblano). But in a pinch I just lightly dust them with cornmeal, fill them with a little cheese, and sauté and serve them with an uncooked fruity and creamy sauce that sets off the heat. It makes a quick appetizer.

Poblanos with Pineapple Cream

Use white or yellow cornmeal; I use my jonnycake meal. Serves 4.

4 medium perfect poblano chiles, skins and seeds removed
2 oz firm mozzarella or soft goat cheese 
1 large eggOLYMPUS DIGITAL CAMERA
1 tea water
1 tea corn oil
pinch salt
cornmeal
2 T unsalted butter
1 T corn oil

¼ buttermilk
¼ cup light cream or half and half
½ cup fresh ripe pineapple

finely chopped cilantro or parsley

Divide the cheese into 4 portions and insert gently into the chiles. Spread a cup or so of cornmeal on a board or sheet of wax paper. In a shallow dish, beat the egg with the water, oil, and salt. Dip the chiles into the egg mixture, turning, and then coat them with cornmeal. Set aside to dry a little.

In a blender, combine the pineapple, buttermilk, and cream or half and half. Puree till smooth; strain if you wish (I don’t), and refrigerate until needed.

Melt the butter with the oil in a 9” sauté pan. Cook the chiles two at a time, turning once, over medium-high heat until golden and the cheese has melted (keep the first batch warm in a 250 F oven while you cook the second). Serve hot with a little of the cold sauce and some chopped fresh coriander or parsley.

 OLYMPUS DIGITAL CAMERA         OLYMPUS DIGITAL CAMERA

Sunday, May 25, 2008

Buttermilk

OLYMPUS DIGITAL CAMERA         My fondness for sour milk in baking, as expressed here , here, and here, extends to its close relative, buttermilk. The buttermilk available to us in stores is “cultured” buttermilk, which is different from what I would call “true” buttermilk—the milk or liquid that remains after butter is churned. Some of you may remember this kind of buttermilk from your youth. It was about the consistency of today’s skim milk, was quite acidic, and often had tiny flecks of butter in it. It was a natural low-fat product.
Today’s cultured buttermilk, on the other hand, is a soured milk product. It is thicker than whole milk, with a taste similar to sour cream but with lower fat—think of low-fat yogurt—making it a good substitute both for sour cream in many baked goods and also for sour whole milk. If you can obtain raw milk, you can make your own cultured buttermilk; the process involves leaving raw milk out to clabber through natural fermentation, removing some and adding more fresh milk to it, and repeating the process at least once more to achieve a thick, sour liquid. It will be different from and higher-fat than the commercial variety, though, which begins with skim or low-fat milk, is injected with bacteria, is both pasteurized and homogenized, and usually contains added salt and sometimes commercial stabilizers, as does some commercial sour cream. Some producers even add fake or real butter flakes; check your label to see what is actually in your store or dairy’s cultured buttermilk. Most “natural” or organic varieties will not contain added stabilizers.
It is the acidity in buttermilk that makes it so attractive for baking. It imparts not only tang but tenderness. Buttermilk is therefore commonly used in cakes, pancakes, waffles, and breads (it makes excellent biscuits and white bread). But it has other uses. It is a great base for low-fat salad dressings and soups, and makes a fabulous, old-fashioned custard-type pie. You can use it to thin mashed potatoes or to add edge to a chocolate sauce or frosting. And of course it can be drunk like any other milk.
When using buttermilk for quick-type baking (i.e., non-yeast), you just need to be sure to use baking soda—about ½-1 teaspoon per cup of flour—to react with the acid to produce carbon dioxide gas to leaven the product and smooth out the acidity. With this addition, you can generally substitute buttermilk for regular milk in most recipes. Always bake your batter or dough immediately after combining your soda and buttermilk or you will lose the powerful but brief burst of leavening action.
Quick Buttermilk Rolls
These are an easy, light, soft, everyday dinner roll—there is only a short kneading and one quick rise. Not as rich as most dinner rolls, they are perfect for people watching their cholesterol, especially if you brush them with margarine instead of butter, as they are made with oil as well as buttermilk and contain no egg. Makes 2 dozen.
2 packages yeast
1 T sugar
¼ cup warm water
1 ½ cups buttermilk OLYMPUS DIGITAL CAMERA
2 T sugar
1 ½ tea salt
½ cup vegetable oil
4 cups a-p flour + up to ½ cup for kneading, sifted or not
1 T melted butter or margarine
Preheat oven to 400 F. Generously grease bottom and sides of a 13x9 baking pan.
In a large bowl, combine yeast, 1 T of sugar, water. Set aside ‘til bubbly.
Heat the buttermilk slowly until just warm; add it to the yeast mixture, followed by the salt, 2 T of sugar, and oil. Stir. Gradually add the 4 cups of flour and baking soda; sifted is preferable, but it’s not a big deal. Cover with a towel and set aside for about 10 minutes.
Put another ¼ cup flour on a board, and turn the dough out; it will hold together but be sticky. Flour your hands and, with the aid of a scraper, knead for about 5 minutes or until the dough is elastic and coherent but still tacky; add additional flour if necessary, but keep the dough soft.
Shape the dough into 24 balls, about 2-2 ½" each, and place them, touching, in the pan. Cover with plastic wrap sprayed lightly with cooking spray, and let rise for a half-hour. Brush with melted butter or margarine and bake for about 12-14 minutes, or until light golden brown. Let cool in the pan on a rack for about five minutes, then turn them out and pull them apart. Serve warm with salted butter, or use for pulled pork or brisket sandwiches.
OLYMPUS DIGITAL CAMERA         OLYMPUS DIGITAL CAMERA