Sunday, May 25, 2008

Buttermilk

OLYMPUS DIGITAL CAMERA         My fondness for sour milk in baking, as expressed here , here, and here, extends to its close relative, buttermilk. The buttermilk available to us in stores is “cultured” buttermilk, which is different from what I would call “true” buttermilk—the milk or liquid that remains after butter is churned. Some of you may remember this kind of buttermilk from your youth. It was about the consistency of today’s skim milk, was quite acidic, and often had tiny flecks of butter in it. It was a natural low-fat product.
Today’s cultured buttermilk, on the other hand, is a soured milk product. It is thicker than whole milk, with a taste similar to sour cream but with lower fat—think of low-fat yogurt—making it a good substitute both for sour cream in many baked goods and also for sour whole milk. If you can obtain raw milk, you can make your own cultured buttermilk; the process involves leaving raw milk out to clabber through natural fermentation, removing some and adding more fresh milk to it, and repeating the process at least once more to achieve a thick, sour liquid. It will be different from and higher-fat than the commercial variety, though, which begins with skim or low-fat milk, is injected with bacteria, is both pasteurized and homogenized, and usually contains added salt and sometimes commercial stabilizers, as does some commercial sour cream. Some producers even add fake or real butter flakes; check your label to see what is actually in your store or dairy’s cultured buttermilk. Most “natural” or organic varieties will not contain added stabilizers.
It is the acidity in buttermilk that makes it so attractive for baking. It imparts not only tang but tenderness. Buttermilk is therefore commonly used in cakes, pancakes, waffles, and breads (it makes excellent biscuits and white bread). But it has other uses. It is a great base for low-fat salad dressings and soups, and makes a fabulous, old-fashioned custard-type pie. You can use it to thin mashed potatoes or to add edge to a chocolate sauce or frosting. And of course it can be drunk like any other milk.
When using buttermilk for quick-type baking (i.e., non-yeast), you just need to be sure to use baking soda—about ½-1 teaspoon per cup of flour—to react with the acid to produce carbon dioxide gas to leaven the product and smooth out the acidity. With this addition, you can generally substitute buttermilk for regular milk in most recipes. Always bake your batter or dough immediately after combining your soda and buttermilk or you will lose the powerful but brief burst of leavening action.
Quick Buttermilk Rolls
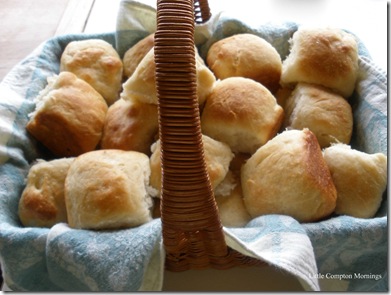
These are an easy, light, soft, everyday dinner roll—there is only a short kneading and one quick rise. Not as rich as most dinner rolls, they are perfect for people watching their cholesterol, especially if you brush them with margarine instead of butter, as they are made with oil as well as buttermilk and contain no egg. Makes 2 dozen.
2 packages yeast
1 T sugar
¼ cup warm water
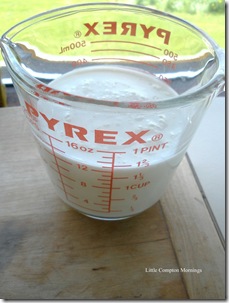
1 ½ cups buttermilk OLYMPUS DIGITAL CAMERA
2 T sugar
1 ½ tea salt
½ cup vegetable oil
4 cups a-p flour + up to ½ cup for kneading, sifted or not
1 T melted butter or margarine
Preheat oven to 400 F. Generously grease bottom and sides of a 13x9 baking pan.
In a large bowl, combine yeast, 1 T of sugar, water. Set aside ‘til bubbly.
Heat the buttermilk slowly until just warm; add it to the yeast mixture, followed by the salt, 2 T of sugar, and oil. Stir. Gradually add the 4 cups of flour and baking soda; sifted is preferable, but it’s not a big deal. Cover with a towel and set aside for about 10 minutes.
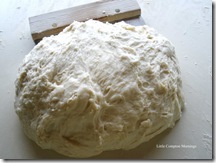
Put another ¼ cup flour on a board, and turn the dough out; it will hold together but be sticky. Flour your hands and, with the aid of a scraper, knead for about 5 minutes or until the dough is elastic and coherent but still tacky; add additional flour if necessary, but keep the dough soft.
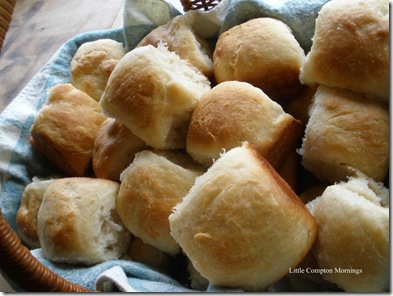
Shape the dough into 24 balls, about 2-2 ½" each, and place them, touching, in the pan. Cover with plastic wrap sprayed lightly with cooking spray, and let rise for a half-hour. Brush with melted butter or margarine and bake for about 12-14 minutes, or until light golden brown. Let cool in the pan on a rack for about five minutes, then turn them out and pull them apart. Serve warm with salted butter, or use for pulled pork or brisket sandwiches.
OLYMPUS DIGITAL CAMERA         OLYMPUS DIGITAL CAMERA

Sunday, May 18, 2008

Eggs: They’re What’s for Dessert

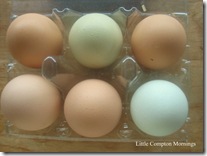
OLYMPUS DIGITAL CAMERA         One of the few signs of spring around here is the appearance along the roadside of signs for local eggs. Most of our local eggs are brown, but we of course have white and increasingly will see lovely pale green eggs. Occasionally, as in the photo below right, they are packaged together, sort of like assorted chocolates.
Last year I provided excruciatingly detailed information on eggs and a recipe for mayonnaise. So I thought I’d skip the lecture and talk about something you don’t hear about too much: eggs for dessert. This is not a new idea by any means, as a perusal of my old cookery books shows. And if you think about it a minute, most of the desserts we eat—puddings, cakes—start out with eggs and sugar. With eggs for dessert, you just stop there. Brilliant!
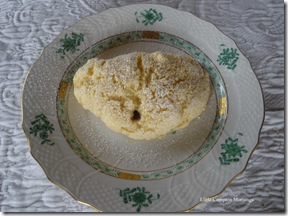
Of course, everyone loves a good soufflé. That is certainly one dessert that can be made with eggs. It begins with a base such as pastry cream or fruit puree, and builds from there. But that’s a bit more than I am talking about. I really am talking about eggs and sugar—sweet omelets.20070720_Mixed Eggs_000453 copy
There are two kinds of sweet omelet: one plain, and very much a sweetened and sometimes flavored version of a regular omelet; and one souffléd, in which the whites are beaten and folded in. Both kinds have pretty much disappeared from the table in this country. I have no idea why, unless it’s the same reason that so many other things have disappeared from our tables: it didn’t lend itself to commercial production, and thus was lost to the generation that grew up on prepared food. Although while that might explain the disappearance of the souffléd omelet, a plain sweet omelet is no different from any other, and we all know we still eat way too many of those.
One could also argue that the sweet omelet is primarily a European thing, something of German, Viennese, or French provenance. My 1960s Mapie, Countess de Toulouse-Lautrec cookbook contains recipes for no less than eight simple sweet omelets. One contains angelica and has a butter sauce with grapes and rum. Yum.
But we Americans are not off the hook. My Gold Medal Flour cookbook—you can’t get more American than that—from 1910 has a recipe for a sweet omelet. And it is a souffléd one.
So no excuses. Try some eggs for dessert. Here are two versions of a souffléd omelet. If you fill your omelet, use your very best homemade, fluid-but-not-too-runny preserves.
Souffléd Omelet I
I first made this recipe at Roberta Dowling's Cambridge School of Culinary Arts, where I did my professional chef training. It is very similar to the Gold Medal recipe, and is very good. Serves 4-6.
5 eggs, separated
¼ cup sugar
¼ cup sifted flour
2 T unsalted butter
Preserves of your choice (I prefer cherry or apricot)
10x for garnish
Preheat the oven to 325 F. Beat egg whites stiff; fold in yolks, sugar, and flour gently. In a 9” frying pan, heat the butter and add the omelet mixture. Bake until slightly yellow, about 15 minutes. Fill with preserves; fold; and transfer to a platter. Sprinkle with 10x and serve.
Souffléd Omelet II
The confectioner’s sugar produces a softer texture, with a somewhat loose center; regular sugar yields a firmer omelet. Serves 3-4.
3 eggs, separated
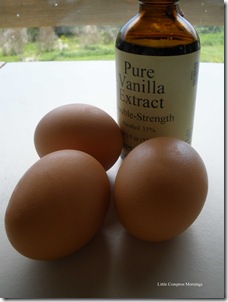
1/3 cup 10x sugar, sifted and packed, or ¼ cup granulated sugar OLYMPUS DIGITAL CAMERA
½ tea vanilla
Pinch salt
1 ½ T flour
2 T homemade cherry or apricot preserves
Additional 10x to garnish
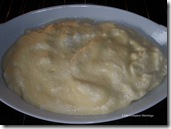
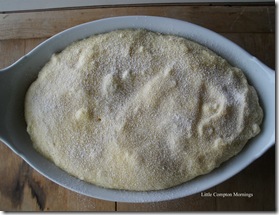
Preheat oven to 325 F. Beat the yolks and sugar with an electric beater; stir in the flour, salt, and vanilla. Beat the egg whites until stiff. Fold them, half at a time, into the egg yolk mixture. Using a large spoon, fill a buttered and sugared pie plate or small gratin with the egg mixture. Bake about 10-12 minutes, until firm to the touch and a skewer comes out clean. Sprinkle with confectioner’s sugar and serve immediately with the preserves or a fruit sauce (you can also put the preserves into the omelet for cooking: spoon half the batter into the pan, distribute the preserves, top with the remaining batter, and bake).
OLYMPUS DIGITAL CAMERA         OLYMPUS DIGITAL CAMERA

Sunday, May 11, 2008

Rhubarb Is For Mothers


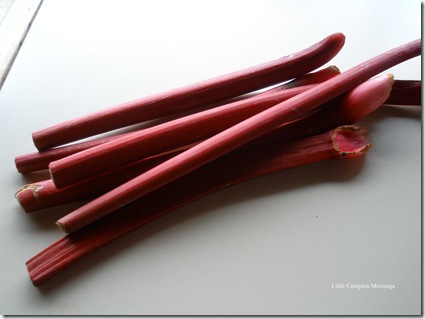
OLYMPUS DIGITAL CAMERA         It’s Mother’s Day, and naturally I’m thinking about rhubarb. If you are under 40, unless you grew up around a grandmother or great-grandmother, you probably have not had much experience with rhubarb. Rhubarb was wildly popular with grandparents, many of whom had their own patches, out back somewhere or alongside a driveway. A perennial that is one of the first vegetables to push its way through the ground in the early spring, it was always watched for with anticipation and greeted with what seemed to be misplaced excitement. The plant itself was sprawly and weedy, the leaves poisonous, and the admittedly pretty red stalks cooked down into a mush. As a child, it seemed to me that eating rhubarb was one of the many things peculiar to the strange ways of old people. No one else could possibly like it.
My grandmother adored rhubarb, and so did my mother—and she was not, I had to admit, all that old when I was a kid. Still, I shunned the stuff for years, as it was usually served up stewed in our house, which was my mother’s and grandmother’s favorite way to eat it. This pinky-beige mush did not tempt me. But eventually, rhubarb pie did; I am, it is well Rhubarb Stewed copyknown, a sucker for pie. I quickly became a rhubarb convert—and stewed rhubarb is now one of my favorite ways to eat it, too. I’m sure my age has nothing to do with it. It’s just absolutely delicious.
Rhubarb is available now until early summer; sometimes, there is a second crop in the fall. This is one of many quirky things about this plant. Rhubarb is something that, because of its unique, astringent flavor, is delicious in hot weather; it makes, for example, thirst-quenching drinks and refreshing cold soups and salad dressings as well as the more standard jams, pies (it is, in fact, commonly known as “pie plant”), crisps, and sauces. It’s even nice eaten raw, like the celery it resembles, sprinkled with sugar. Given its hot-weather affinity, rhubarb really should have a season like June-September. But since it does not, I suggest freezing some for hot-weather use, including freezing some of the jam or sauces you might make now. Rhubarb sauce is very nice over creamy vanilla ice cream.
To freeze rhubarb (I provided information on buying and storing it in a recent Edible Rhody article), wash the stalks, trim the ends, and cut slim (1” stalks) crosswise into 1” chunks; for fatter stalks, slice them in half lengthwise, and string if needed, before cutting across. If you have a good freezer, you can pack it raw without sugar, freezing it as you do for berries, first on a cookie sheet and then sealing in double plastic bags. You can also blanch it for about a minute before packing, or pack it raw or blanched in a light syrup made with about ¾ cup sugar to each cup water. Commercially frozen rhubarb is also very good.
Rhubarb is excellent on its own, but I don’t think it’s ever met a fruit it didn’t like: it goes well with strawberries, blueberries, raspberries, pineapple, banana and other tropical fruits, apples, dates and figs, and citrus. It likes spice, especially ground or crystallized ginger, a traditional British addition (the British love rhubarb so much that John Cleese of Monty Python fame once wrote a song proclaiming that “eternal happiness is a rhubarb tart”). If you tire of cooking with it, and you have access to the leaves and roots, you can make insect repellant, cleaning products, or a rinse to lighten your hair. It’s a versatile and delicious plant.
Try some--in honor of your mother or grandmother, of course. Happy Mother's Day.
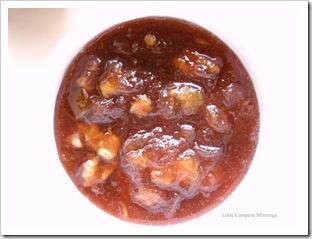
Spiced Pineapple-Rhubarb Conserve

Rhubarb is a natural for small batch preserving. Makes 2 pints.OLYMPUS DIGITAL CAMERA
3 cups rhubarb in ½” slices, about 6 slim stalks 
2 cups chopped fresh pineapple
2/3 cup chopped candied orange peel
½ cup chopped crystallized ginger
3 cups sugar
1 cup light brown sugar, packed
½ tea finely ground black pepper
½ cup coarsely chopped walnuts or pecans (optional)
Combine all ingredients except the nuts in a medium bowl and let macerate for 4 hours, stirring occasionally. In a non-reactive 4 qt pan (e.g., stainless steel or enameled cast iron), bring the mixture slowly to a boil, stirring, then reduce the heat to medium. Cook at a gentle boil, skimming during the first 5 minutes or so, until it sheets from a spoon, about 15 minutes. Stir in the nuts. Pour into clean jars and seal.
                                         OLYMPUS DIGITAL CAMERA

Sunday, May 4, 2008

LCM First Anniversary

OLYMPUS DIGITAL CAMERA         First, the coffee. I started writing about food on this blog a year ago this weekend, beginning as all my musings about cooking and eating do, in the morning, walking out with my coffee or, when the weather keeps me inside, at the kitchen window. With the exception of a few balmy days, it’s been a cool and breezy—and often rainy—spring after a raw winter, so most of my blog thinking and coffee drinking lately has been the latter. Looking out the window brings its own pleasures, though, particularly for someone like me who likes to observe from the outside (or, in this case, inside). Yesterday I had the treat of watching a mother wild turkey with her russet, energetic baby turkey as they foraged for food and she tried to keep him from plunging into the brush. In recent weeks, seeing a young deer I’d worried about all winter emerge not only alive but getting along well elicited a triumphant hurrah. This deer, one of a family of four, has had one leg severed at the elbow since I first saw him as a tiny fawn—from what? A hunter? Trap? Birth defect? If this three-legged deer can survive, then spring brings hope for us all.
The anniversary of Little Compton Mornings has come upon me suddenly, much like spring always does after a seemingly endless dark winter: you wake up one day and the grass is green, and it’s light when the day is done. Yet while a year seems to have flown by, on closer examination it’s possible to trace the passage of time through events, appointments, holidays, trips, milestones of work and family. It is life, not time, that is going by quickly.
So too with this blog. In the past year, I posted 53 times—one for good measure, I guess, like the extra candle on a cake. I look back amazed: more than 48,000 words and 304 photos (about 15% of those I took). I wrote about coffee, beef, cornmeal, rose hips, berries, vegetables, fish, flour, stone fruits, syrup. I made drinks, appetizers, soups, main courses, side dishes, breads, desserts, and provided the recipes. For someone used to throwing things together, this was a greater discipline even than making sure I did not miss a week of posting (I became religious about this). Sometimes I forgot to record what I was doing as I cooked, and had to reconstruct it. Another challenge was learning to take food photos, still a bit tricky even with a forgiving digital camera. Lesson number 1 (hard learned): turn off the flash.
At first I worried that I would run out of things to write about. Now, I can’t believe I ever thought that, and my real concern is finding the time to write about the things I’d like to—and in particular, to cook and provide well-documented recipes for those things. Cooking takes time, and I have often had to choose something that is not too labor intensive, and reserve those that are (like the lobster bisque) for special occasions. While I’ve managed a first pass at many classic Rhode Island ingredients and dishes, from coffee syrup to the debate over jonnycakes (thick or thin?), many await discussion in the coming year—the most egregious being, of course, the Trinity.
I’ve tried to look back and assess what kind of blog I write. This is neither idle navel-gazing nor a conceit: writing always takes on a life of its own. From a technical standpoint, the postings are longer than I expected and than they are for most blogs—the longest was 2092 words or some 8 double-spaced pages—and readers seem to like the depth. Every post carries a recipe. Not sure I knew I was getting into that. From a content standpoint, two things are pretty clear. My blog tends to showcase ingredients in a rather microscopic way—consistent with my notion of seasonality, but not something I had anticipated. And it is squarely in the homey, and home-cooking, category—something I had. For all its hominess, though, it has its characteristically (for me) investigative, information-based side. Part of the pleasure is in the knowing, the considering, the evaluating, the discussing. But not too seriously. Food is, in my blog, part of the conversation of life.
Through all this writing, it is, naturally, my readers that have motivated me. My readers seem to be readers and users and do not often comment on the blog itself—although I welcome and encourage that—but many of you have written me wonderful emails so full of appreciation and gratitude that I blushed with pride to read them. I can’t tell you how much this has meant to me as I sit here writing away on my own. I’ve also had the pleasure of meeting a few of you, which has been great fun. Thank you all.
To celebrate our year of Little Compton Mornings, I have made what I always asked my mother to make for my birthday: a pie. It’s too early for berries, and the lemons, a usual fallback, are not particularly nice. Chocolate, however, is always in season.
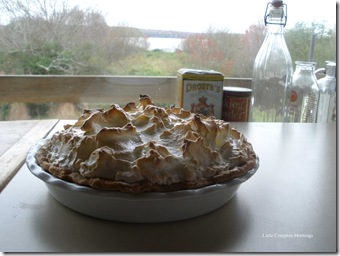
Anniversary Chocolate Cream Pie
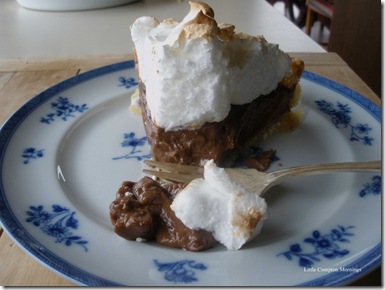
Contrary to popular opinion, the “cream” in cream pie refers to the filling, not the topping. However, this old-fashioned pie can also be made with whipped cream instead of meringue; both are excellent and feel celebratory and indulgent. I depart from my usual lard or lard/shortening crust in favor of an all-butter crust for this pie, both for complementary flavor and for sturdiness beneath the custard filling. Nobody makes this pie anymore—yet men and women alike swoon over it. Let’s mark Little Compton Mornings’s anniversary by bringing it back. Serves 6.
The All-Butter Crust OLYMPUS DIGITAL CAMERA
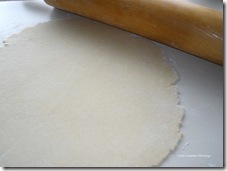
This needs to be blind-baked, so plan ahead.
1 ½ cups a-p flour
2 T sugar
1/8 tea salt
4 oz (1 stick or ½ cup) cold unsalted butter, preferably cultured, high- butterfat
      (sometimes called “European style”)
3-5 T ice water
1 T heavy cream
Put the dry ingredients into the food processor with the metal blade. Add the butter, cut into at least 8 pieces. Pulse 15-20 times, until the mixture is crumbly but not so fine as to be sandy. With the motor running, add 3 T of the ice water and the cream, then add the remaining water gradually and stopping as soon as the dough comes together. Remove, pat gently into a disc, and refrigerate for an hour or overnight. OLYMPUS DIGITAL CAMERA
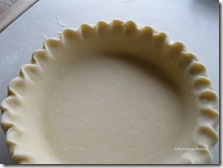
Preheat the oven to 425 F. Let the dough soften a bit and then roll it out on a floured board to 1/8” thick. Fit it comfortably into a 9” pie plate, trim and turn under the rim, crimp the edge, and prick the bottom and sides with a fork. (You can re-roll the scraps and make little turnovers filled with blackberry or other jam for baking with the pie crust and then sprinkling with sugar for a cook’s treat.) Chill the crust for an hour in the refrigerator or 20 minutes in the freezer.
Place a piece of foil inside and fill with dried beans, rice, or aluminum pie weights. Bake for 10 minutes; reduce the heat to 350 F and bake 10 minutes more. Lift out the foil and weights and bake until golden and crisp, about 5-10 minutes more.
The Chocolate Pudding

1/3 cup flour
2/3 cup sugar
Pinch salt
2 ¾ cups milk, heated to steaming
2 squares unsweetened chocolate
3 extra-large egg yolks OLYMPUS DIGITAL CAMERA
1 tea pure vanilla extract and 1 tea pure chocolate extract, or 2 tea vanilla
1 T unsalted butter
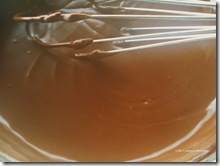
Combine the dry ingredients in a 3-qt saucepan, preferably one with sloped sides. Using a whisk, gradually stir in the milk over medium heat. Add the chocolate and whisk continuously; the mixture will amalgamate and then thicken. It should bubble gently. Cook 5 minutes more.
Remove the pan from the heat. Beat the egg yolks in a spouted cup or small bowl. Remove about ¼ cup of the chocolate mixture and stir it into the yolks until well blended; Add the tempered yolks to the pan. Return to the heat and cook, stirring, for another two minutes. Remove from the heat and stir in the extract(s) and the butter. Set aside for half an hour, covered with a piece of plastic wrap.
The Meringue
3 extra-large egg whites
6 T sugar
Pinch salt
Beat the egg whites with the salt ‘til foamy, then gradually add the sugar, continuing to beat until they are very white, shiny, and thick, and form a beak when the beater is lifted. Be careful not to overbeat.
Finishing the Pie
Preheat the oven to 425 F. Pour the slightly cooled pudding into the pre-baked pie shell, rotating the plate to spread it; use a flat offset spatula or back of a spoon if necessary. Pile the meringue very gently onto the pudding, ensuring it overlaps the edge of the pie shell. Bake about 6-8 minutes, or until lightly golden. Cool to room temperature before serving (it is ethereal served this way, fresh). Refrigerate leftovers.
OLYMPUS DIGITAL CAMERA
_____
To those of you who took the time to vote for me in Best of Rhode Island, thank you for your support.
It’s come to my attention that some of you who have email subscriptions may not be receiving all your weekly emails. Please check your spam folder, and if you find Little Compton Mornings there, flag it as O.K. for your Inbox. If that is not the problem, try re-subscribing.