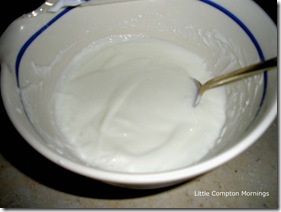
 I’ve never met a dairy product I didn’t like, so pretty much as soon as yogurt appeared on the grocery shelves, I’ve been eating it. And I’ve been making it, on and off, for almost 25 of those eating years, ever since my friend and neighbor in Pacific Grove, California, taught me how. Carol was married to an Armenian at the time, and though it is a really, really good thing that she is no longer with this particular man, she did acquire through the marriage a number of useful recipes from his mother. I was one of the happy beneficiaries.
A few years after that I made my first trip to Europe, where, we all know, the soft, fresh-tasting yogurt is divine. Then of course there is Greek yogurt, the equivalent, in texture, of eating sour cream. For a long time these were both difficult to find in this country, and on return from traveling one would reluctantly settle back into the U.S. offerings, experimenting to find the one brand among the sea of containers that was not loaded with sugar or artificial sweetener, gloppy old fruit jelly on the bottom, or some sort of stabilizer such as gelatin that gave the yogurt a texture that you could actually cut. Horrible stuff. And even the reasonably palatable ones still lacked the soft texture of the real thing.
Recently I went into a store where all the yogurt was junk, almost all of it artificially sweetened. I am wont to experience food outrage in supermarkets, and I was prepared to confront the manager when, down in a lowly corner of the otherwise infuriating shelves, I spotted about six containers among the hundreds —six, I kid you not—of Emmi yogurt. Emmi is a Swiss product, and they (unlike Dannon) seem to have decided that they will only sell the identical product, not an Americanized version, in this country. I snapped up all six and proceeded to check-out, where I was in for another shock: they were $1.50 a piece, twice the cost of the other yogurts.
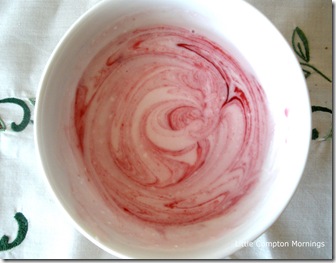
So I decided to make yogurt this weekend, and I think I am just going to get back in the habit so I can have the kind of soft, creamy, superfresh-tasting yogurt I prefer. I love yogurt year-round, but in the summer it is such a pleasure to eat it with peaches sautéed in butter and brown sugar, or with a spoonful of freshly made jam or, my favorite, a not-too-sweet fresh raspberry, cherry, or blackberry sauce. These I stir in to make a completely smooth and uniform but intensely flavored breakfast treat; for visual appeal, I partially stir in a bit more at the end to give it a marbleized look.
I don’t have a yogurt maker, although I hear they are very good and I may break down and buy one, particularly because yogurt-making can be slightly fickle when you are trying to control the level of warmth yourself. Below is the general method, and a few tips.
Soft European-style Yogurt with Fruit
The addition of some nonfat dry milk powder supports a uniform texture, but it is not necessary if you don’t have it on hand. Makes about a quart.
1 quart 2% milk ( you can use whole or 1%, but skim doesn’t seen to work so well)
1/3 cup nonfat dried milk (optional, but useful)
4 T fresh, cold plain yogurt with live culture (check label)
Fruit puree, fruit syrup, homemade jam or preserves, sautéed fruit
Method
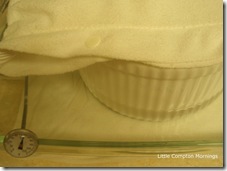
Set up a bain-marie by placing a heatproof bowl into a larger heatproof pan; here I used a soufflé dish inside a lasagna pan. Boil some water and keep it warm on the back of the stove.
Using a thermometer, in a saucepan bring the milk to just under a boil (below 212°F; this will help make a firmer texture as well as thwart bacteria). Remove it from the heat and pour it into the bowl. Transfer your thermometer to the bowl, and let the milk cool to 110°F; you can place the bowl in some cold water to help it cool more rapidly, which is desirable. Skim the skin off and discard.
Add the yogurt with live culture to the cooled milk. Using a flat paddle-like spoon or spatula, gently combine; do not beat. Pour warm water around the bowl in the bain-marie and insert your thermometer; if the water is 120°F or more, add cold tap water to bring it down: 110° is ideal, but anywhere between 95-115° will be fine. Keep the milk mixture cozy and at the optimal temperature until the yogurt sets, adding hot water if needed, anywhere from 3-6 hrs. Watch it, but do not disturb it!
When the yogurt is ready, immediately refrigerate it; see “Maintaining Temperature” below for notes about testing. You can put it into separate sterilized small jars or transfer it to another clean bowl. It will keep for about two weeks. Top with or mix in fruit, fruit preserves, or fruit sauce to serve.
Here are some alternatives for maintaining temperature during incubation, in my order of preference. Generally, I want to be able to see it so that I don’t forget about it, because you really do not want it to go too long or it may throw whey (liquid milk protein) and get curdy looking (although not curdled tasting). Start checking after a couple of hours; you can see when it is set, and you can test it by just slightly tilting the bowl to verify.
1. A large heating pad and towel. Place the heating pad running vertically on the counter and turn it on high. Set the pan perpendicularly on the lower half, then bring the other half over the top of the bowl. Cover all with a towel so you take in the sides, letting the thermometer poke out.
2. On top of an old-fashioned gas stove with a pilot light. When I first started making yogurt, I set it in the center of the 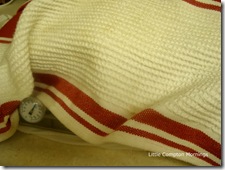 top of my old professional O’Keefe and Merritt gas range, where the pilot light, hidden away but always at the ready to ignite a burner, lived its secret, useful life. Alas, I no longer have this wonder of a stove, and newer gas ranges are pilot-less. This would be my first-choice method if I still had a gas stove with pilot.
3. In a sunny window or outside on a deck or balcony. This is the “solar” method, a modern version of the nomadic back-of-the-camel method. The main reason I like this is that it is out in plain sight. But it takes attention, there’s a risk you may need to move it, and you of course have to keep it tightly covered or fully contained if it is outside.
4. In a thermos. If you have one that is big enough and good enough to maintain temperature for a good 3-6 hours, you could theoretically skip the bain-marie. It’s not easy to check readiness or temperature, though.
5. In an oven set to around 150-200°F to create an ambient warmth of around 100. You don’t need the bain-marie. But I don’t like it because I tend to forget about it, even using a timer; you can’t hear it if you’re not right around the kitchen. Also, it gets disturbed when you move it from the counter to the oven, or pull out the shelves to check it. And it’s hard to control the oven temperature.
